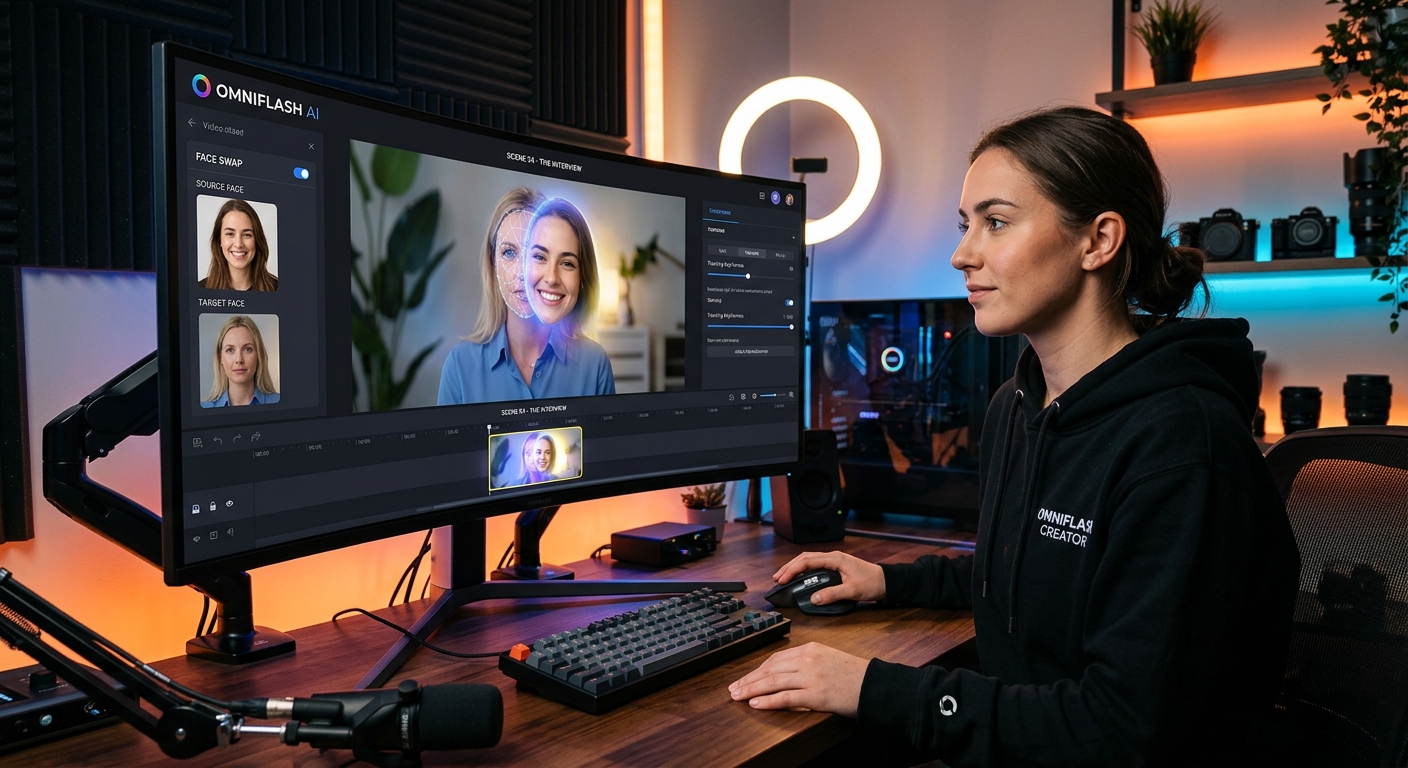
You just generated a stunning video clip in Omniflash. The lighting is cinematic. The motion is smooth. The scene looks exactly like what you described in your prompt. And then you notice the face. It belongs to nobody in particular. It is a generic AI character with nothing to do with your brand, your channel, or the persona your audience has come to recognize. That gap between a polished clip and your clip is one of the most common friction points creators hit after working with AI video tools for the first time.
The good news is that the gap is fixable. You do not need expensive compositing software or a background in post-production to close it. The workflow is shorter than most people expect, and once you have run through it a couple of times, it becomes a fast, repeatable step in your content pipeline.
Your AI Clip, Your Face: Three Steps That Make It Personal
- Prompt Omniflash to generate a base clip featuring a clear, forward-facing character with even lighting on the face
- Export the footage and prepare a clean, high-resolution reference photo of the face you want to use
- Apply a face replacement tool to overlay your likeness onto the AI character before publishing
Why AI-Generated Characters Always Look Like Strangers
Omniflash is a text-to-video model. You feed it a prompt and it builds footage from patterns baked into its training data. It has no way of knowing what you look like. It has no access to your brand guidelines, your style references, or your channel aesthetics. So it invents a face, and that face is usually convincing enough to pass as realistic, but completely disconnected from you as a creator.
This is not a limitation unique to Omniflash. It is how generative video models work across the board. Getting a precise facial likeness from a text description alone is genuinely difficult. Prompts like "a woman with short auburn hair and freckles in her mid-thirties" will produce wildly different characters across separate generation runs. The model is optimizing for a believable, well-composed scene, not for a specific person's appearance.
That means the cleanest path forward is to separate the two jobs. Let Omniflash handle scene composition, motion, lighting, and everything it does well. Handle the face separately, in post, where you have precise control over whose face appears on screen.
Prompting Omniflash to Set You Up for a Cleaner Swap
Not every Omniflash clip is equally easy to work with at the face-replacement stage. A few small prompt choices made upfront can save a significant amount of time and troubleshooting later.
These details are worth building into your default generation style:
- Ask for a character who faces the camera directly rather than looking to one side or turning away from the lens
- Request smooth, controlled head movement rather than fast turns or extreme close-ups that distort facial proportions
- Specify natural, even lighting on the face, since deep shadows or harsh contrast make blending considerably harder
- Avoid prompting for elaborate hairstyles, wide-brim hats, or accessories that partially cover the face
When your base clip gives you a stable, well-lit, forward-facing character, the replacement step is far more precise. Clips where the character constantly spins, tilts dramatically, or moves through extreme lighting shifts create visible seams at the face boundary that are difficult to remove cleanly.
Choosing a Reference Photo That Works in Your Favor
The quality of your final output depends just as much on your source image as it does on the Omniflash footage itself. A great base clip cannot compensate for a blurry or inconsistently lit reference photo. The two inputs need to be matched in quality.
Aim for a shot that is sharp, evenly lit, and taken roughly straight on. Passport-style photos are a reliable starting point because they are standardized for exactly the kind of forward-facing, neutral expression that face replacement tools work best with. Avoid images where you are squinting, turning your head sharply, or partially obscured by another object in the frame. Natural light or a ring light setup tends to produce cleaner extractions than mixed indoor lighting with strong color casts from multiple sources.
Resolution matters in a very concrete way. A high-resolution image gives the processing tool more facial detail to work with, and that shows up directly as a more realistic, better-blended composite in the final video. A compressed or low-resolution phone selfie limits what the tool can produce, regardless of how polished the base clip is.
Keep a small folder of reliable reference photos taken in different lighting conditions. Having three or four solid options ready means you can pick the one that best matches the lighting in any given Omniflash clip, rather than needing to reshoot every time.
Performing the Face Swap on Your Exported Footage
Once your Omniflash clip is exported and your reference photo is ready, the replacement step itself is straightforward. This is where video face swap technology acts as the practical bridge between your AI-generated footage and a clip that genuinely represents you.
The general workflow across most tools follows a consistent pattern. You upload the base video, upload your reference photo, and the tool processes the footage frame by frame. It identifies the face in the AI clip, maps your facial features onto it, and adjusts for the character's lighting, skin tone, and movement throughout the clip. The output is a new video file with your face composited onto the AI character.
It is fair to acknowledge that this technique carries some cultural weight. The same frame-by-frame compositing process is what researchers discuss in the literature on synthetic media and the ethics around AI-manipulated video. That context matters and is worth being aware of. The distinction here is clear: you are overlaying your own real face onto an AI-generated character, not impersonating another person. Used with that intent and that transparency, it is a legitimate production technique with genuine creative purpose.
Reviewing the Output Before You Finalize
Most face swap tools return your processed video as a single file. Some offer additional controls for blend strength, skin tone matching, or edge smoothing before final export. If your tool gives you those options, spend a few minutes with them rather than accepting the first output as finished.
Watch the result at full resolution and look for these common issues:
- Edge artifacts where the swapped face meets the original character's hairline, neck, or ears
- Color mismatches where your face tone does not sit naturally within the lighting conditions of the surrounding scene
- Tracking slips during fast movement, where the face alignment breaks for a frame or two and snaps back
- Lighting inconsistencies that make the face look composited onto the scene rather than present within it
If you spot problems, the fix often starts with the reference photo. Trying a different image with more consistent lighting or a slightly different angle can produce a noticeably cleaner result. Minor color mismatches can often be corrected with basic color grading in a video editor after the swap is complete, which adds only a few minutes to the process.
Fitting This Step Into Your Content Production Rhythm
The first time through this workflow takes longer because you are learning the tools and calibrating your reference photo library. After that, the pace picks up considerably, and the step starts to feel routine rather than technical.
For short-form clips of a few seconds, the total added time is often under ten minutes from export to finished file. Longer videos take more, but the per-second cost in time stays roughly predictable once you know your toolchain. That makes it easy to budget for the step when planning a batch of content for the week.
Creators who run this regularly tend to generate their Omniflash clip, queue it in the swap tool, and work on captions or thumbnails while the processing runs. By the time the captions are drafted, the video is ready. The step slots into existing production time rather than adding a separate block to the calendar.
Putting Your Mark on Every Clip You Generate
The strongest AI-assisted video content does not look like a raw model output with nothing added. It looks like someone made a creative decision at every stage, from the initial prompt through to the final published version. Replacing the AI character's face with your own is one of the most direct creative decisions you can make in this workflow, and it changes how audiences relate to the content.
Omniflash handles what is genuinely hard to produce: well-rendered motion, cinematic scene composition, and footage quality that would require a significant production setup to match manually. What it cannot hand you is your presence, your face, or the visual consistency your audience expects from your channel.
Adding that final layer takes a few extra minutes per clip. What it produces is footage that carries both the production quality of AI generation and the personal authenticity that keeps an audience engaged and coming back. That combination is what separates polished AI-assisted content from footage that looks like it came straight off the model with nothing added. Your face is part of your brand, and now your AI-generated clips can carry it.